Remastering
Contents
1 Get a gentoo admin cd
- Go to gentoo.org/downloads
- Go to Mirrors
- Select a mirror
- Go to releases/<arch>/autobuilds/current-admincd-<arch>/
- Download and check iso
Example for Switzerland: http://mirror.switch.ch/ftp/mirror/gentoo/releases/x86/autobuilds/current-admincd-x86/
Or get the version used in this tutorial from here.
2 Set up the environment
Let's create a clean directory to work in. Copy the ISO to the directory and change into it afterwards.
user@local:~$ mkdir /tmp/remaster
user@local:~$ cp admincd-x86-20160119.iso /tmp/remaster/
user@local:~$ cd /tmp/remaster/
user@local:/tmp/remaster$ ls
admincd-x86-20160119.iso
3 Extract files
The ISO is essentially an archive. We'll re-create the ISO later on, so let's get the original contents. This is very easily done by mounting the image and copying the files. Don't forget to unmount the image.
user@local:/tmp/remaster$ sudo mount -o loop admincd-x86-20160119.iso /mnt/
mount: block device /tmp/remaster/admincd-x86-20160119.iso is write-protected, mounting read-only
user@local:/tmp/remaster$ mkdir admincd
user@local:/tmp/remaster$ cp -r /mnt/* admincd/
user@local:/tmp/remaster$ ls -1 admincd
gentoo.efimg
gentoo.efimg.mountPoint
image.squashfs
isolinux
livecd
README.txt
user@local:/tmp/remaster$ sudo umount /mnt
4 Unpack the root directory
We're mainly interested in image.squashfs. That's the future root directory. Changes we make there will be reflected in the booted live system. So let's get the files. Again, we have to extract the contents from the squashfs file.
You need squashfs-tools (debian package) to continue.
user@local:/tmp/remaster$ cd admincd/
user@local:/tmp/remaster/admincd$ sudo unsquashfs image.squashfs
Parallel unsquashfs: Using 2 processors
62141 inodes (68754 blocks) to write

[===========================================================\] 68754/68754 100%
created 59190 files
created 4421 directories
created 2677 symlinks
created 271 devices
created 1 fifos
user@local:/tmp/remaster/admincd$ ls -1
gentoo.efimg
gentoo.efimg.mountPoint
image.squashfs
isolinux
livecd
README.txt
squashfs-root
This command created the directory squashfs-root. Let's have a look inside.
user@local:/tmp/remaster/admincd$ ls -1 squashfs-root/
bin
boot
dev
etc
home
lib
media
mnt
opt
proc
root
run
sbin
sys
tmp
usr
var
5 Modify the root directory
Anything you do to the root directory will afterwards be present in the booted live system. So let's tamper with some files.
user@local:/tmp/remaster/admincd$ cd squashfs-root/
user@local:/tmp/remaster/admincd/squashfs-root$ sudo vim etc/profile
user@local:/tmp/remaster/admincd/squashfs-root$ sudo vim root/greeter
user@local:/tmp/remaster/admincd/squashfs-root$ cd ..
6 Re-pack the root directory
So now, it's the same process in reverse. First, you have to create the squashfs file from your modified root directory. For this, there's the command mksquashfs. Be sure not to pick the original file (image.squashfs), this won't work. Use a new file instead and move it afterwards.
Note that you can also skip this part and Alternative: Create a setup for user-driven remastering. Especially, if you do the remastering repeatedly, maybe even with other people involved.
user@local:/tmp/remaster/admincd$ sudo mksquashfs squashfs-root image-new.squashfs
Parallel mksquashfs: Using 2 processors
Creating 4.0 filesystem on image-new.squashfs, block size 131072.
[===========================================================/] 65806/65806 100%

Exportable Squashfs 4.0 filesystem, gzip compressed, data block size 131072
    compressed data, compressed metadata, compressed fragments, compressed xattrs
    duplicates are removed
Filesystem size 391237.38 Kbytes (382.07 Mbytes)
    28.19% of uncompressed filesystem size (1387678.62 Kbytes)
Inode table size 623340 bytes (608.73 Kbytes)
    28.46% of uncompressed inode table size (2189975 bytes)
Directory table size 582674 bytes (569.02 Kbytes)
    42.71% of uncompressed directory table size (1364317 bytes)
Number of duplicate files found 9610
Number of inodes 66561
Number of files 59191
Number of fragments 3759
Number of symbolic links  2677
Number of device nodes 271
Number of fifo nodes 1
Number of socket nodes 0
Number of directories 4421
Number of ids (unique uids + gids) 15
Number of uids 5
    root (0)
    unknown (88)
    nobody (65534)
    unknown (123)
    unknown (91)
Number of gids 13
    root (0)
    disk (6)
    news (9)
    tty (5)
    unknown (88)
    man (12)
    colord (121)
    uucp (10)
    unknown (406)
    unknown (248)
    bluetooth (120)
    unknown (250)
    pulse-access (123)
user@local:/tmp/remaster/admincd$ ls -1
gentoo.efimg
gentoo.efimg.mountPoint
image.squashfs
image-new.squashfs
isolinux
livecd
README.txt
squashfs-root
This gives you the file image-new.squashfs. Now, move it over to image.squashfs, overwriting the original file (copy that one somewhere else if you still need it).
user@local:/tmp/remaster/admincd$ mv image-new.squashfs image.squashfs
user@local:/tmp/remaster/admincd$ ls -1
gentoo.efimg
gentoo.efimg.mountPoint
image.squashfs
isolinux
livecd
README.txt
squashfs-root
Before you continue, remove leftovers of your work. You should end up with exactly the same file structure as in the beginning. At least the squashfs-root directory has to be deleted.
user@local:/tmp/remaster/admincd$ sudo rm -r squashfs-root/
user@local:/tmp/remaster/admincd$ ls -1
gentoo.efimg
gentoo.efimg.mountPoint
image.squashfs
isolinux
livecd
README.txt
7 Re-create the ISO file
So, we already have the updated squashfs, let's pack it into a new ISO file. That's what mkisofs is for. You can use it to create an ISO file from a directory. If you used different names, have a look at the last two arguments (-o master.iso admincd). Copy/paste the rest of the parameters.
Note that you don't necessarily need to create the ISO. If you want to boot via USB stick, you have two options. Either try the approach shown here, with isohybrid. Or read Alternative: Create a USB boot stick, which works on the admincd structure directly, without the ISO.
user@local:/tmp/remaster/admincd$ cd ../
user@local:/tmp/remaster$ ls -1
admincd
admincd-x86-20160119.iso
user@local:/tmp/remaster$ sudo mkisofs -R -J -l -no-emul-boot -boot-load-size 4 -boot-info-table -r -b isolinux/isolinux.bin -c isolinux/boot.cat -o master.iso admincd
I: -input-charset not specified, using utf-8 (detected in locale settings)
Size of boot image is 4 sectors -> No emulation
  2.38% done, estimate finish Sun Jan 31 18:30:32 2016
  4.76% done, estimate finish Sun Jan 31 18:30:32 2016
  7.14% done, estimate finish Sun Jan 31 18:30:32 2016
  9.52% done, estimate finish Sun Jan 31 18:30:32 2016
 11.90% done, estimate finish Sun Jan 31 18:30:32 2016
 14.27% done, estimate finish Sun Jan 31 18:30:32 2016
 16.66% done, estimate finish Sun Jan 31 18:30:32 2016
 19.03% done, estimate finish Sun Jan 31 18:30:32 2016
 21.41% done, estimate finish Sun Jan 31 18:30:32 2016
 23.79% done, estimate finish Sun Jan 31 18:30:32 2016
 26.17% done, estimate finish Sun Jan 31 18:30:32 2016
 28.54% done, estimate finish Sun Jan 31 18:30:35 2016
 30.93% done, estimate finish Sun Jan 31 18:30:35 2016
 33.30% done, estimate finish Sun Jan 31 18:30:35 2016
 35.68% done, estimate finish Sun Jan 31 18:30:34 2016
 38.06% done, estimate finish Sun Jan 31 18:30:34 2016
 40.44% done, estimate finish Sun Jan 31 18:30:34 2016
 42.82% done, estimate finish Sun Jan 31 18:30:34 2016
 45.20% done, estimate finish Sun Jan 31 18:30:36 2016
 47.57% done, estimate finish Sun Jan 31 18:30:36 2016
 49.96% done, estimate finish Sun Jan 31 18:30:36 2016
 52.33% done, estimate finish Sun Jan 31 18:30:35 2016
 54.71% done, estimate finish Sun Jan 31 18:30:35 2016
 57.09% done, estimate finish Sun Jan 31 18:30:35 2016
 59.47% done, estimate finish Sun Jan 31 18:30:35 2016
 61.84% done, estimate finish Sun Jan 31 18:30:35 2016
 64.23% done, estimate finish Sun Jan 31 18:30:35 2016
 66.60% done, estimate finish Sun Jan 31 18:30:35 2016
 68.98% done, estimate finish Sun Jan 31 18:30:34 2016
 71.36% done, estimate finish Sun Jan 31 18:30:34 2016
 73.74% done, estimate finish Sun Jan 31 18:30:34 2016
 76.12% done, estimate finish Sun Jan 31 18:30:34 2016
 78.50% done, estimate finish Sun Jan 31 18:30:34 2016
 80.87% done, estimate finish Sun Jan 31 18:30:34 2016
 83.26% done, estimate finish Sun Jan 31 18:30:34 2016
 85.63% done, estimate finish Sun Jan 31 18:30:34 2016
 88.01% done, estimate finish Sun Jan 31 18:30:34 2016
 90.39% done, estimate finish Sun Jan 31 18:30:34 2016
 92.77% done, estimate finish Sun Jan 31 18:30:34 2016
 95.14% done, estimate finish Sun Jan 31 18:30:34 2016
 97.52% done, estimate finish Sun Jan 31 18:30:35 2016
 99.91% done, estimate finish Sun Jan 31 18:30:35 2016
Total translation table size: 2048
Total rockridge attributes bytes: 3146
Total directory bytes: 11268
Path table size(bytes): 82
Max brk space used 22000
210210 extents written (410 MB)
So that's done, you have now a master.iso file in the remaster directory. Before booting it, make it bootable from usb with isohybrid.
user@local:/tmp/remaster$ ls -1
admincd
admincd-x86-20160119.iso
master.iso
user@local:/tmp/remaster$ sudo isohybrid master.iso
8 Boot the system
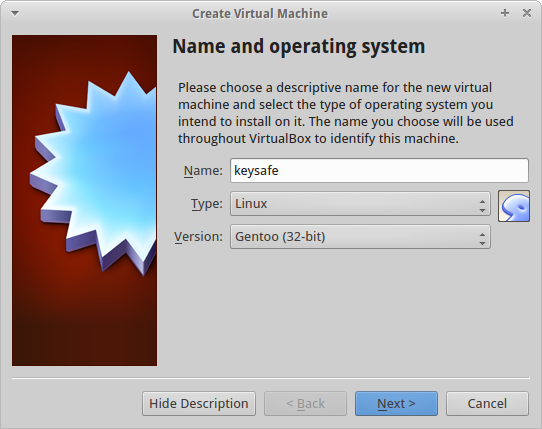
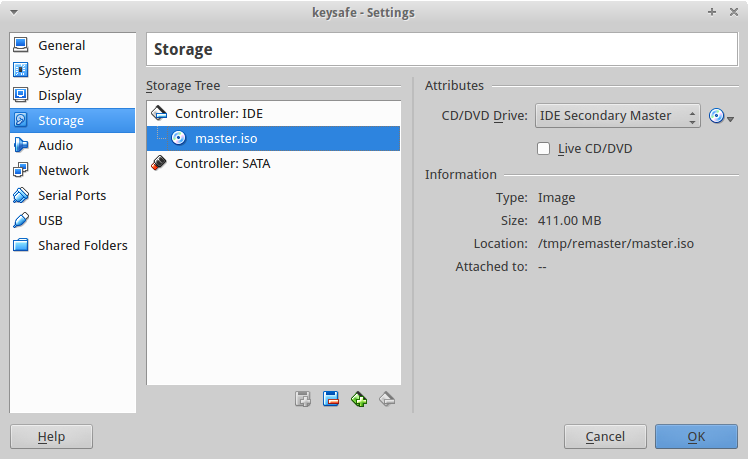
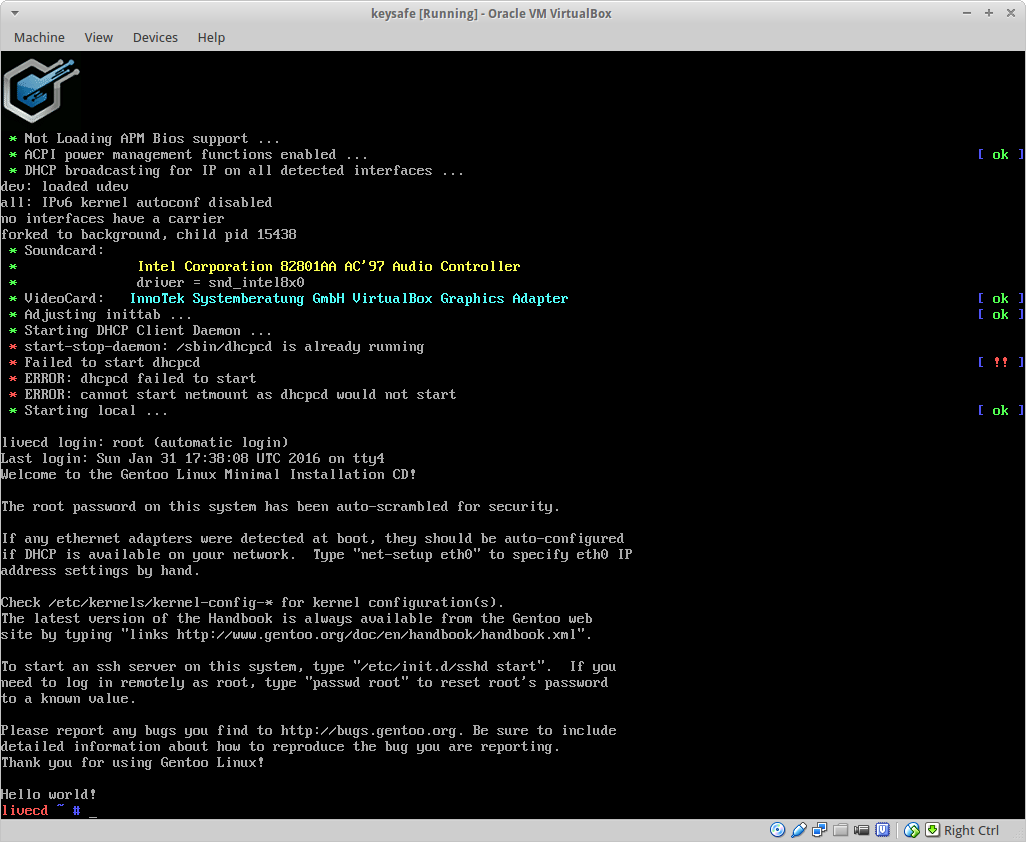
The iso file /tmp/remaster/master.iso now contains your remastered live system. Put it into VirtualBox as CD-ROM and start the virtual machine.
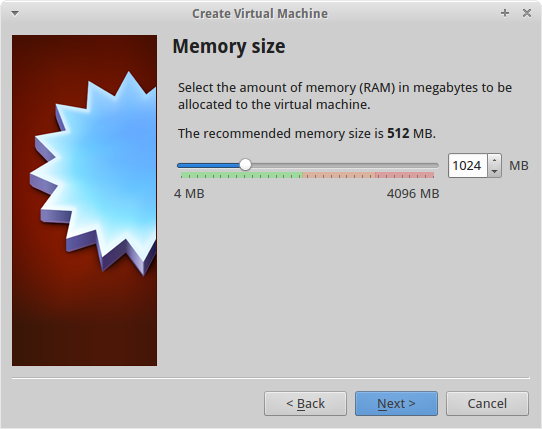
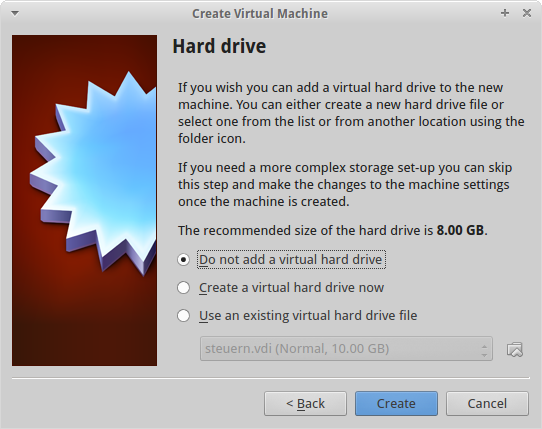
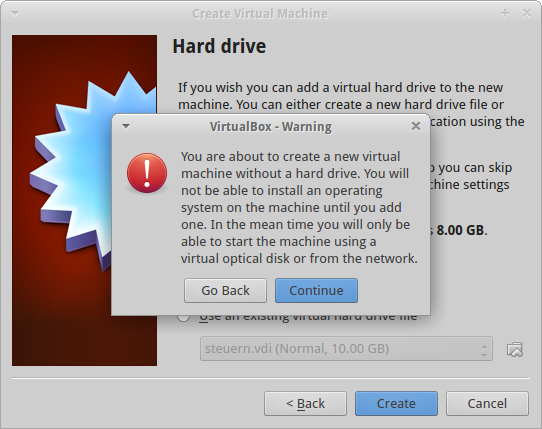
Setting up a virtual machine is rather easy. Follow the wizard without adding a hard disk (you don't need one anyways), then add the ISO as CD-ROM and fire up the machine. Here's some screenshots to guide you.
The virtual machine creation wizard is straight forward:
Change the CD controller in the settings to your ISO
And start up the machine.
9 Alternative: Create a setup for user-driven remastering
Follow the tutorial just before step 5 (Re-pack the root directory). Now, you can diverge slightly from the straight-forward remastering. The concepts are still the same. But you do it in a different way. One which allows to create multiple remastered versions easily.
Specifically, the situation is that you have some changes of your own but allow other users to contribute more changes. You want to prepare the remastering and take as much work off the user's as possible, while still allowing them to do their job. So let's get started.
9.1 Seperate 'static' content from files changable by the user
You have made some changes to the root directory. Now move all top-most directories in which the user is allowed to modify something outside the squashfs-root directory. It's important to move the directory from the root on. If the user can modify /etc/bash/bashrc, you have to move the /etc folder. Because of this limitation, it's a good practice to restrict the user to changes of the /root directory. You can probably bend the rest of the file system with scripts, commands or symlinks to follow this.
user@local:/tmp/remaster/admincd/squashfs-root$ sudo mv root ../
user@local:/tmp/remaster/admincd/squashfs-root$ ls -1
bin
boot
dev
etc
home
lib
media
mnt
opt
proc
run
sbin
sys
tmp
usr
var
9.2 Pack the static part
Having split the root directory in two parts, you can now pack the static part. Meaning, the part of the root directory the user does not need to change. As with the original tutorial, mksquashfs packs all the files together. This time, we use base.squashfs as target image.
user@local:/tmp/remaster/admincd/squashfs-root$ cd ..
user@local:/tmp/remaster/admincd$ sudo mksquashfs squashfs-root base.squashfs
Parallel mksquashfs: Using 2 processors
Creating 4.0 filesystem on base.squashfs, block size 131072.
[===========================================================-] 65803/65803 100%

Exportable Squashfs 4.0 filesystem, gzip compressed, data block size 131072
    compressed data, compressed metadata, compressed fragments, compressed xattrs
    duplicates are removed
Filesystem size 391236.87 Kbytes (382.07 Mbytes)
    28.19% of uncompressed filesystem size (1387677.92 Kbytes)
Inode table size 623225 bytes (608.62 Kbytes)
    28.46% of uncompressed inode table size (2189816 bytes)
Directory table size 582506 bytes (568.85 Kbytes)
    42.70% of uncompressed directory table size (1364169 bytes)
Number of duplicate files found 9609
Number of inodes 66556
Number of files 59187
Number of fragments 3759
Number of symbolic links  2677
Number of device nodes 271
Number of fifo nodes 1
Number of socket nodes 0
Number of directories 4420
Number of ids (unique uids + gids) 15
Number of uids 5
    root (0)
    unknown (88)
    nobody (65534)
    unknown (123)
    unknown (91)
Number of gids 13
    root (0)
    disk (6)
    news (9)
    tty (5)
    unknown (88)
    man (12)
    colord (121)
    uucp (10)
    unknown (406)
    unknown (248)
    bluetooth (120)
    unknown (250)
    pulse-access (123)
user@local:/tmp/remaster/admincd$ ls -1
base.squashfs
gentoo.efimg
gentoo.efimg.mountPoint
image.squashfs
isolinux
livecd
README.txt
root
squashfs-root
As with the original tutorial, let's clean up here. Remove the squashfs-root directory and also the image.squashfs file. Remove other leftovers as well, but not the directories moved from the root structure before (here the root folder).
user@local:/tmp/remaster/admincd$ sudo rm -r squashfs-root/
user@local:/tmp/remaster/admincd$ rm image.squashfs
user@local:/tmp/remaster/admincd$ ls -1
base.squashfs
gentoo.efimg
gentoo.efimg.mountPoint
isolinux
livecd
README.txt
root
9.3 Prepare user-driven remastering
You now have a parts of the live system packed together in base.squashfs. You also have some other files which were in the iso archive. And there's the directory the user has to modify. Put them into a suitable directory structure and ship all files to your users.
user@local:/tmp/remaster/admincd$ mkdir live
user@local:/tmp/remaster/admincd$ mv {gentoo.efimg,gentoo.efimg.mountPoint,isolinux,livecd,README.txt} live/
user@local:/tmp/remaster/admincd$ ls -1
base.squashfs
live
root
user@local:/tmp/remaster/admincd$ mkdir update
user@local:/tmp/remaster/admincd$ sudo mv root update/
user@local:/tmp/remaster/admincd$ ls -1
base.squashfs
live
update
You ship the admincd directory to the user. The live folder contains files for the iso image. The base.squashfs is the root directory prepared by you. The update folder contains everything the user can modify.
9.4 The user's job
Your fellow user now gets the prepared squashfs, the other iso contents and a directory to modify. After having made some changes, the remastering can be completed quickly. Using mksquashfs, the updated directory is added to your base squashfs (with the static content). The result is again packed into an ISO file and that's it.
So first, the user changes some files in the update directory*.
user@local:/tmp/remaster/admincd$ cd update
user@local:/tmp/remaster/admincd/update$ sudo vim root/greeter
user@local:/tmp/remaster/admincd/update$ cd ..
Then, let's create the final squashfs image. Note that files in the update directory are appended to the image. Meaning that directories are just added to the archive. Since the operation is not recursive, you have to move the top-level directory when splitting. Otherwise (i.e. the root folder exists in base.squashfs) the user's content would be put in a directory called root_1 or similar.
First we copy the base.squashfs over to the live tree. This way, the prepared base.squashfs is preserved and the process can be repeated multiple times. Then, the image is updated.
user@local:/tmp/remaster/admincd$ cp base.squashfs live/image.squashfs
user@local:/tmp/remaster/admincd$ sudo mksquashfs update/ live/image.squashfs
Found a valid exportable SQUASHFS superblock on live/image.squashfs.
    Compression used gzip
    Inodes are compressed

[...] # omitted mksquashfs output

user@local:/tmp/remaster/admincd$ ls -1 live/
gentoo.efimg
gentoo.efimg.mountPoint
image.squashfs
isolinux
livecd
README.txt
Having the image.squashfs ready, you continue the original tutorial with creating the ISO.
9.5 Create a ISO image
Again, note that you don't necessarily need to create the ISO. If you want to boot via USB stick check out Alternative: Create a USB boot stick, which works without the ISO.
user@local:/tmp/remaster/admincd$ mkisofs -R -J -l -no-emul-boot -boot-load-size 4 -boot-info-table -r -b isolinux/isolinux.bin -c isolinux/boot.cat -o master.iso live
I: -input-charset not specified, using utf-8 (detected in locale settings)
Size of boot image is 4 sectors -> No emulation
  2.38% done, estimate finish Sun Jan 31 19:54:49 2016

[...] # omitted mkisofs output

210210 extents written (410 MB)
user@local:/tmp/remaster/admincd$ isohybrid master.iso
user@local:/tmp/remaster/admincd$ ls -1
base.squashfs
live
master.iso
update
And like this get the master.iso, like before.
Now, the neat part is that these last three commands can easily be summed up in a script and shipped to the user. Put the script update-image.sh into the admincd folder and let it run after the changes to update have been made.
user@local:/tmp/remaster/admincd$ ls -1
base.squashfs
live
update
update-image.sh
user@local:/tmp/remaster/admincd$ chmod "+x" update-image.sh
user@local:/tmp/remaster/admincd$ ./update-image.sh
mksquashfs requires root permissions; using sudo, please provide password if prompted

[...] # mksquashfs and mkiso output

To create a boot stick (sdX), type:
$ sudo dd if=master.iso of=/dev/sdX
user@local:/tmp/remaster/admincd$ ls -1
base.squashfs
live
master.iso
update
update-image.sh
Again, you end up with the master.iso
10 Alternative: Create a USB boot stick
If you want to create a USB stick to carry your system, run isohybrid on it and copy the iso to the stick with dd. If this method doesn't work, follow the tutorial on gentoo.org:
https://wiki.gentoo.org/wiki/LiveUSB/Guide
Look it up and/or follow the instructions below. You'll need to have syslinux installed.
Create a FAT16 file system on your USB stick. Replace sdXY by the device address (e.g. sdc1, sdd1, ...).
user@local:/tmp/remaster$ mkdosfs -F 16 /dev/sdXY
mkfs.fat 3.0.22 (2013-07-19)
Then, copy the MBR to the stick. Again, replace sdX with your device, as before.
user@local:/tmp/remaster$ sudo dd if=/usr/share/syslinux/mbr.bin of=/dev/sdX
0+1 records in
0+1 records out
440 bytes (440 B) copied, 0.00522668 s, 84.2 kB/s
Mount the usb stick
user@local:/tmp/remaster$ sudo mount -t vfat /dev/sdXY /mnt/usb
Copy over the files.
user@local:/tmp/remaster$ ls -1
admincd
admincd-x86-20160119.iso
user@local:/tmp/remaster$ sudo cp admincd/isolinux/* /mnt/usb
user@local:/tmp/remaster$ sudo cp admincd/* /mnt/usb
cp: omitting directory ‘admincd/gentoo.efimg.mountPoint’
cp: omitting directory ‘admincd/isolinux’
user@local:/tmp/remaster$ cd /mnt/usb
user@local:/mnt/usb$ sudo mv isolinux.cfg syslinux.cfg
user@local:/mnt/usb$ sudo mv memtest86 memtest
user@local:/mnt/usb$ sudo rm isolinux.bin
user@local:/mnt/usb$ ls -1
boot.cat
boot.msg
elilo.efi
F2.msg
F3.msg
F4.msg
F5.msg
F6.msg
F7.msg
gentoo
gentoo.efimg
gentoo.igz
image.squashfs
kernels.msg
livecd
memtest
README.txt
syslinux.cfg
System-gentoo.map
Now, following the documentation, change the syslinux.cfg file.
user@local:/mnt/usb$ sed -i -e "s:cdroot:cdroot slowusb:" -e "s:kernel memtest86:kernel memtest:" /mnt/usb/syslinux.cfg
Unmount the usb stick and run syslinux on the device.
user@local:/mnt/usb$ cd
user@local:~$ sudo umount /mnt/usb
user@local:~$ sudo syslinux /dev/sdXY